Showing posts with label mint. Show all posts

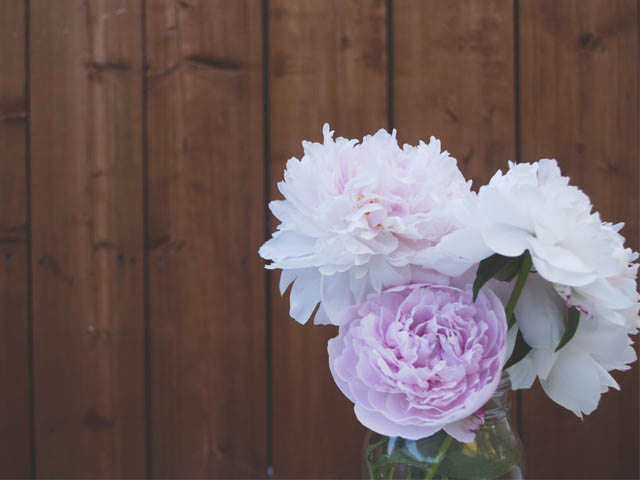
mint & peonies.

So, unlike last summer which was full of constant baking and crafting and making, this summer, so far, has been full of adventures, books, bike rides and coffee dates.  Namely, things that I'm not really used to blogging about.  But I missed you guys so I thought I would try and mix it up and see what happens!
When I moved out in January my dad gave me this sweet little vintage cabinet for our living room.  I really wanted to refinish/re-paint it right away, but seeing as how there was 6 feet of snow on the ground and and I didn't really want to cover my hardwood floors in mint paint it got moved in as-is.  I finally got around to re-painting it today, and I am so so glad I did it.  It looks so much better, a little mint paint can fix anything!  I love the curves along the bottom and how the front hinges down to open up.  It's the perfect size to display pretty blooms, sweet dishes and lovely little bottles of perfume!
 Do you have any chipped, unfinished or sad looking pieces of furniture lying around that need a little love?  Make it your summer project!  It can give a completely new life to an object that's been sitting in your basement forever and make you love it all over again.
To re-paint my cabinet I sanded all the surfaces just enough to rough up the surface a bit, wiped it all down with a damp cloth to remove the sawdust, let it dry, applied one coat of primer and two coats of paint, letting dry sufficiently between each coat.  From start to finish it only took 2 and a half hours. It was a sweet way to spend my morning in my sunny backyard.
You cannot believe how happy I am to have summer and the warm weather here!  I am so excited for all the fun things the next two months hold! xo, T.

d.i.y. tassel necklace.

So apparently it's supposed to be spring now.  Winnipeg doesn't seem to know that though, currently there are 10 foot snow banks outside my window and there were flurries of snow when I went grocery shopping this morning.  Even though our city doesn't seem to be very welcoming of warmer temperatures I am very very ready for some sunshine and some colour to start popping up in place of all this white - that is also now brown, grey and sandy :(.  But since the colour is not yet appearing outside I decided to bring it into my wardrobe with this ombre necklace of mints, greens and aquas - these colours make me happy every time I see them!
This necklace is super simple, and will have you feeling like spring in no time.  It's fairly impossible to not instantly feel happier when you're wearing something so colourful and fun!
what you need:
_embroidery floss in a variety of colours.  I chose to do a ombre gradient. Do whatever makes you happy.  one skein of thread makes two tassels, so decide how big of a necklace you want ahead of time.  mine has 15.
_chain.
_needle nose pliers.
_scissors.  preferably sewing scissors.
_bobby pin.

What you do:
_2: figure out what kind of pattern you want.  I chose to do a chevron shape with a gradient of mint to aqua and teal.
_3:take your loop of embroidery floss and snip one end so that it is now multiple single strands instead of one  long strand.  divide it into two.
_4: taking one half of your thread slip your bobby pin onto one end making sure all of the ends of your floss are threaded through.  
_5:using the pin as your needle, thread your floss through one circle of your chain, starting in the centre.
_6:pull it half way through so that the length of thread is folded over the bottom of the circle of chain and there is an equal amount of thread in the front and back.
_7: cut a length of thread of the same colour and tie it around the top of the tassel to secure it, as close to the top as your can.  tie a double knot and snip the excess thread.
_8:repeat the above steps working your way outwards until your necklace is completed.  make sure all of your knots from step 7 are on the same side so that you have a back and a front to your necklace.
_9: using your needle nose pliers open the end ring on your chain and slip the ring on the other end through, using flat nose pliers to clamp down on the open ring to secure it.  clip off any excess chain.  If you like you can now use your sewing scissors to trim your tassels into any desired shape, I chose a chevron, or you can simply just clean up the messy edges and leave the ends even.
I hope adding this pop of colour to your day makes it feel more like spring, whatever the weather happens to be at the moment!
Also, notice all the pretty pictures?  They were taken by the very lovely and very talented Mackenzie Loewen.  You can find more of her awesome work here. xo, T.

d.i.y. necklace frame.

So, this January I moved into a lovely new house with a lovely roommate and lovely upstairs neighbours!  It's  pretty awesome and it's really fun getting to slowly decorate our little apartment.  One thing that is not so awesome is that I don't know where half my stuff is. Still.  Three months later.  This is mainly due to the fact that I didn't take half my furniture with me and therefore half my belongings are thrown into the shelves of my closet in a giant mess.  This is one attempt at fixing that.
Not only do these pair of frames keep all of my necklaces and bracelets untangled and visible (if I can't see it I won't wear it) but they also add a bit of sweetness to my empty walls!

You may rememeber a similar d.i.y from a while back when I made a earring frame as a Christmas present.  This is almost the exactly the same process; ugly frames, pretty paper and a piece of wood, except this time I used Krylon pistachio spray paint instead of primer to paint my frames and hooks from Home Depot instead of nails.  You can find more detailed instructions in my previous post here.
I can't wait to fill up my house with other sweet little projects! xo, T.

mint chocolate cupcakes and wooden skies.


mint chocolate cupcakes, with my absolutely favourite frosting.
 This week has been a very "little suzy homemaker" week.

Tuesday was spiced apple muffins from smitten kitchen, and as I type this homemade pizza, inspired by one of my lovely Anna magazines is in the oven.  These were Wednesday's adventure.

Although muffins are delicious and a most delightful snack they are not dessert, and will never be dessert.  Dessert has to involve copious amounts of frosting, chocolate and adorable plates and the first two were very much lacking.  I decided to fix this problem by baking my absolute favourite thing: cupcakes.  Perhaps it is the lovely swirls of frosting, the adorable petite size of them or more likely, the large quantities of delicious buttercream, but I absolutely adore them.

I have been waiting for a while to bake these, the peppermint extract that I made is finally ready, and my mint plant is somewhat selfishly taking over its allotted space in my garden.  So obviously this was the first logical thing to do! 

The last time I made these was the past fall, during a somewhat terrible week turned wonderful when The Wooden Sky happened to be playing in the city.  That week became wonderful mostly due to the fact that I adore both cupcakes and The Wooden Sky and the combination is even more fantastic.

Enjoy!


the mint extract! the mint extract! hanging out
with our lovely bunny cookie cutter that just happened to be around.

the dry ingredients.  Martha Stewart would be ashamed I didn't sift the cocoa powder.
add all the wet ingredients and mix until it looks chocolately and delicious.
fill baking cups approximately 2/3 full.  (note that they are way more full, this is a reoccurring issue.)
beautiful and awaiting their lovely frosted tops!
the much used, much loved frosting recipe. 

the lovely garden mint gets folded into the buttercream.
This recipe was adapted from Martha Stewart, who I shameless admit was my childhood role model.  I realize other children probably had Barbie, the Spice Girls and/or a variety of superheros but I had Martha.  That probably explains a lot.

Chocolate Mint Cupcakes
modified from the much adored martha stewart

1 1/2 cups all-purpose flour
3/4 cup unsweetened Dutch-process cocoa powder (I love the Dutch!)
1 1/4 cups sugar
1 1/2 teaspoons baking soda
3/4 teaspoon baking powder
3/4 teaspoon salt
2 large eggs
3/4 cup buttermilk (if you happen be like me and enjoy baking on a whim with a very empty kitchen you can make your own buttermilk by adding between 1-2 tablespoons of vinegar to some milk and letting it sit for a minute to thicken!)
3 tablespoons vegetable oil
3/4 cup warm water
2 teaspoons pure peppermint extract

Whisk together the flour, cocoa powder (sift this first to make extra-smooth batter!), sugar, baking soda, baking powder and salt.

Add in eggs, one at a time, making sure they are thoroughly incorporated before adding the oil and water.  Add in the peppermint last.  This creates a very liquidy batter, don't be frightened, it will bake into beautiful, moist cupcakes soon!

Taste the batter.  If it isn't minty enough add a bit more extract.

Line a muffin tin with cupcake liners and fill 2/3 of the way full.  Place in a 350 degree oven and bake for 20-25 minutes or until a knife comes out clean.  Let cool while whipping up your gorgeous buttercream!  Makes 15 or so, again I tend to fill the cupcakes a bit higher than directed.

Mint Buttercream
my most favourite frosting recipe.

1 1/2 cups icing sugar
1/4 cup flour
1/4 cup butter, room temperature
1/4 milk
1/4 mint leaves, finely chopped

Whisk together dry ingredients.  Add the butter.  Pour in the milk a bit at a time and beat until fluffy and a bit shiny, about 3-5 minutes in a stand mixer.  Sprinkle in the finely chopped mint and carefully fold in.

Frost cupcakes to your heart's content with an offset spatula!  If you would like to create whimsical swirls of piped icing, I suggest doubling the recipe above, otherwise you will have very small swirls.

delectable looking cupcakes waiting innocently to be devoured.
Arrange on your loveliest little cake stand and eat while nostalgically wishing The Wooden Sky would come back to the city and being very glad that you still have a decent chunk of time until you have to start thinking about school.