Showing posts with label spring. Show all posts

d.i.y. chalkboard paint plant pots


It's gradually starting to feel like summer here.  It snowed three weeks ago, and by this point I think we've all just decided to bypass spring and go straight to summer!

One of my favourite parts of warmer weather is when the greenhouses open and all of a sudden my parent's yard is filled with colourful blooms and new little buds.  I love love love flowers.  However, I tend to be a horrible gardener...after three weeks I get distracted and I forget to weed/water.. and everything dies.  So this year I decided to start small and manageable with pots, I feel this will end far nicer.  They make my house so much prettier!

And to make things even more fun I decided to add some chalkboard paint, because chalkboard paint makes everything far more fantastic!
Things you need:
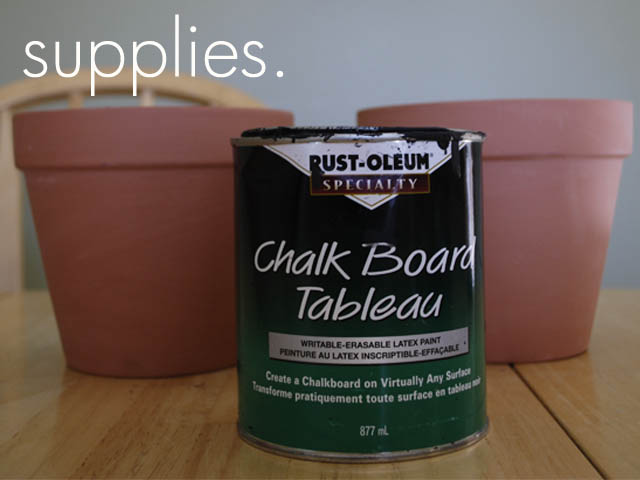
_chalkboard paint.  I used Rust-Oleum.
_terracotta pots.
_paint brush.  And if you're fanatical about straight lines, painter's tape.
What you do:
1.  draw out your shape on your pot with a pencil.  I decided to go with two hearts and a triangle.
2.  using the paintbrush (smaller is better) paint in your shape, starting with the outline and then painting your way inwards.  If you require straight edges I would recommend taping off your shape with painter's tape!
3.  finish painting in your shape, making sure your layer of paint is smooth and even.
4.  let your pots dry according to manufacturer's directions.  Mine called for a three day drying time.
5.  one dry, prime your chalkboard surface by rubbing the side of a piece of chalk across the surface and then wiping off with dry cloth.  This helps it to erase better.
And you're done!  Now you can make a pretty label for your new plant that you can redesign on a whim!
I think these would make the sweetest housewarming gift!  Is your house or yard starting to look like summer?  xo, T.


d.i.y. painted wood bead necklace.

You know what spring means?  It means not having to wear a million layers of clothing!  Which  means I can finally wear necklaces without having them getting completely tangled up in knit scarves and I no longer have to choose between being warm and wearing pretty things!
In anticipation of this warmer weather (it snowed yesterday in Winnipeg guys!) I have been in a definite necklace making mood.  I love wooden beads because you can make so many pretty things out of them, and all you need is paint - and if you're me, glitter!
I wanted something that was kind of neutral, but still fun, I've been really into grays and gold lately.  I love how it turned out, and of course the little bit of glitter makes it even better!
What you need:
_wooden beads in whatever size you like.
_ribbon
_a little bit of chain (optional - if you use it you also need pliers.)
_paint
_clear coat spray paint
_glitter and white glue (optional)
what you do:
_1: paint all of your beads. I find it easiest to use a small brush and paint one half  of all the beads and then go back and paint the other half.  I did two coats.
_2: if you feel like adding some sparkle this is your chance.  I mixed two shades of Martha Stewart glitter together (yellow barite + Florentine gold).
_3:paint your bead with white glue and roll through your glitter. tap off excess and let dry.  touch up any spots that got missed.
_4: I only wanted a little bit of sparkle so I glittered three of my gold beads, but do as many as makes you happy!
_5: lay out all your beads on newspaper and spray with your clear coat.  This adds a shine to your beads and locks in the glitter to keep it from flaking off.  Spray one side, let dry, turn over and spray the other side. Apply two coats.
_6:make sure your beads are completely dry before threading them onto a ribbon.  I find it easiest to thread if I wrap a bit of masking tape around the end of the ribbon (kind of like a shoelace!)
_7:  if you want , add a length of chain to your necklace after threading the beads onto the ribbon, tying it securely and trimming the ends. Note:  leave a bit more length than what I've shown, otherwise you run the risk of it unraveling and beads cascading everywhere!
You can either join the two ends of chain with a clasp or jump ring and call it a day, or if you're like me and just happen to have a scrap of chain lying around you can tie more ribbon onto the other end to make your necklace longer.

And that's it, you're done!  And now you have something else pretty to add to your spring wardrobe.  Have fun experimenting with different paint techniques and glitter, I think a polka dot one would be sweet too!
Have a lovely weekend!   Also like the straight hair?! xo, T.

And again, the prettiest pictures are by the lovely Mackenzie loewen!

recipe: lemon squares {& happy easter!}

Happy Easter everyone!  I hope you're enjoying your weekend, have eaten plenty of chocolate bunnies and that it's finally starting to fee like spring, wherever you are!  It was actually above zero in Winnipeg yesterday! Hooray!

One of my absolute favourite warm weather desserts are lemon squares.  I love love love citrus-y things. I could eat lemon curd with a spoon, and have done so, on multiple occasions, actually..

Anyways, I present to you my most favourite recipe for lemon squares, the epitome of picnics, sundresses and carefree sunny afternoons!

Lemon Squares. modified from here.

Crust:
3/4 C. butter, room temperature.
1/2 C. sugar.
2 C. unbleached flour.

Filling:
4 eggs.
1 C. sugar.
zest of two lemons.
juice of 3 lemons (approx. 3/4C.)
1/4 C. unbleached flour.
1 tsp. baking powder.
1 tbsp. icing sugar.


    1_grease a 13" x 9" pan and line with parchment paper.
2_beat butter and sugar until fluffy, approx. 5 minutes.  add flour and mix until incorporated.  it will be super crumbly, so don't worry!  press into your prepared baking pan and bake at 325 degrees until golden, 25 minutes or so.  if you're using a glass baking pan remember to always lower the temperature by 25 degrees.
3_make the filling.  in a mixer beat the eggs and sugar until pale and thickened.  5-8 minutes.
4_add zest, juice and dry ingredients and mix until just incorporated.  
5_pour over your crust and bake at 325 degrees until set, around 25-30 minutes.  let cool completely before dusting with powdered sugar and cutting into squares.  Enjoy!
Have a splendid week in the sunshine! xo, T.

d.i.y. tassel necklace.

So apparently it's supposed to be spring now.  Winnipeg doesn't seem to know that though, currently there are 10 foot snow banks outside my window and there were flurries of snow when I went grocery shopping this morning.  Even though our city doesn't seem to be very welcoming of warmer temperatures I am very very ready for some sunshine and some colour to start popping up in place of all this white - that is also now brown, grey and sandy :(.  But since the colour is not yet appearing outside I decided to bring it into my wardrobe with this ombre necklace of mints, greens and aquas - these colours make me happy every time I see them!
This necklace is super simple, and will have you feeling like spring in no time.  It's fairly impossible to not instantly feel happier when you're wearing something so colourful and fun!
what you need:
_embroidery floss in a variety of colours.  I chose to do a ombre gradient. Do whatever makes you happy.  one skein of thread makes two tassels, so decide how big of a necklace you want ahead of time.  mine has 15.
_chain.
_needle nose pliers.
_scissors.  preferably sewing scissors.
_bobby pin.

What you do:
_2: figure out what kind of pattern you want.  I chose to do a chevron shape with a gradient of mint to aqua and teal.
_3:take your loop of embroidery floss and snip one end so that it is now multiple single strands instead of one  long strand.  divide it into two.
_4: taking one half of your thread slip your bobby pin onto one end making sure all of the ends of your floss are threaded through.  
_5:using the pin as your needle, thread your floss through one circle of your chain, starting in the centre.
_6:pull it half way through so that the length of thread is folded over the bottom of the circle of chain and there is an equal amount of thread in the front and back.
_7: cut a length of thread of the same colour and tie it around the top of the tassel to secure it, as close to the top as your can.  tie a double knot and snip the excess thread.
_8:repeat the above steps working your way outwards until your necklace is completed.  make sure all of your knots from step 7 are on the same side so that you have a back and a front to your necklace.
_9: using your needle nose pliers open the end ring on your chain and slip the ring on the other end through, using flat nose pliers to clamp down on the open ring to secure it.  clip off any excess chain.  If you like you can now use your sewing scissors to trim your tassels into any desired shape, I chose a chevron, or you can simply just clean up the messy edges and leave the ends even.
I hope adding this pop of colour to your day makes it feel more like spring, whatever the weather happens to be at the moment!
Also, notice all the pretty pictures?  They were taken by the very lovely and very talented Mackenzie Loewen.  You can find more of her awesome work here. xo, T.

d.i.y. beeswax candles.


Guess what?  I'm back..and with crafts!  After multiple months, moving, going to Mexico, breaking up with people and having it snow a million times, I finally have a camera and a sunny living room in which to take pictures.  I could not be happier.  There are so many pretty things I want to share with you!

As a child I was slightly a bit of a pyro, mainly in the area of candles.  Bonfires were fun, but candles, candles were so awesome!! (This probably has something to do with me being a child of the 90's, I can't help it.) There were candle making parties; where if you had a hair dryer, sheets of coloured beeswax - and if you were lucky, some glitter - you could amuse yourself for hours rolling candle after candle.  And then there were the charm candles!  Layers of different coloured wax, each containing a different charm that held a different meaning.  I would sit in my room burning multiple charm candles willing them to melt faster so that I could have whatever pretty thing lay inside..and then would promptly lose the tiny plastic object five minutes later.  I was a fire hazard. My mum was not into charm candles.
While I no longer spend hours watching wax melt, I still love candles, especially beeswax ones.  They smell amazing and are naturally pretty, without the glitter. and the fake fragrances & colours. and the charms...

They are also super easy to make!  All you need is beeswax, wick and some jars.  The trickiest part is tracking down the wax, we are lucky enough to have a honey factory here in Winnipeg that also supplies wax.  But if you can't find it locally, then there are lots of sources online...and of course there is always etsy.
Beeswax Candles.
Note: I bought 2 pounds and made 4 candles, of varying size (the largest is 500 ml.)  But you can make as many as your heart desires.
You need:
_glass jam jars in vary sizes.  check thrift stores for cheap vintage ones!
_wick. (mine is a roll from Michaels.)
_beeswax.  check out the Bee Maid website here.  We have a factory here in Winnipeg, but you can also order their wax online!
_a old glass bowl.
_a hammer and a chisel.  I'm serious.

1.  break your giant chunks of beeswax into smaller pieces so that they melt properly.  This is where the hammer and chisel comes in.  I tried it with a knife, it sucked.  The chisel is the way to go.  If you don't have a chisel you can also use a flat head screw driver.  Break the wax into roughly 1" pieces.
2.  melt the wax in a double boiler.  This is where the old glass bowl comes in, since after it's covered in wax it will forever be a bowl for wax and not a bowl for food.  stir occasionally.
3.  prepare your candle.  cut a length of  wick about an inch longer than your jar.  wrap the extra inch around a pencil. set aside.
4.  using a measuring cup (again, once you use it, it is forever a craft project measuring cup and not a food measuring cup) fill your jar with wax.  I filled mine to the base of the rim.  insert the wick into the centre of your candle while the wax is still liquid.  I find it helpful to dip it once, lift it out, let the wax harden on the wick and then put it back in.  it stays straighter this way.
5.  the wax will go from a golden brown colour, to a light yellow, to a more golden yellow when it's finally cooled.  When your candle is hardened and cool to the touch trim your wick, light, and enjoy!  And repeat until you have a happy group of candles!
My house smells so wonderful now!  And these little projects help distract me from the fact that it is still winter here.  With signs of more snow.  Lame.  But at least the spring flowers are starting to come into the flower shops! yay tulips!
I can't wait to share more pretty things with you. xo. T.